How To Add a Site to BetterShield Hub?
Open a site's BetterShield Hub screen from its address, install BetterShield when needed and approve the connection on the site.
The Hub Add a site screen opens the site’s own BetterShield connection page. Hub never connects a site by address alone.
Note: Sign in to your free BetterShield Hub account. Your workspace role and site permissions determine which information and actions you can use.
What it does
Enter a site address to open BetterShield › Hub there. If BetterShield is not installed, the screen also offers the site’s WordPress plugin installer.
Step 1: Open Add a site
In Hub, select Add a site.
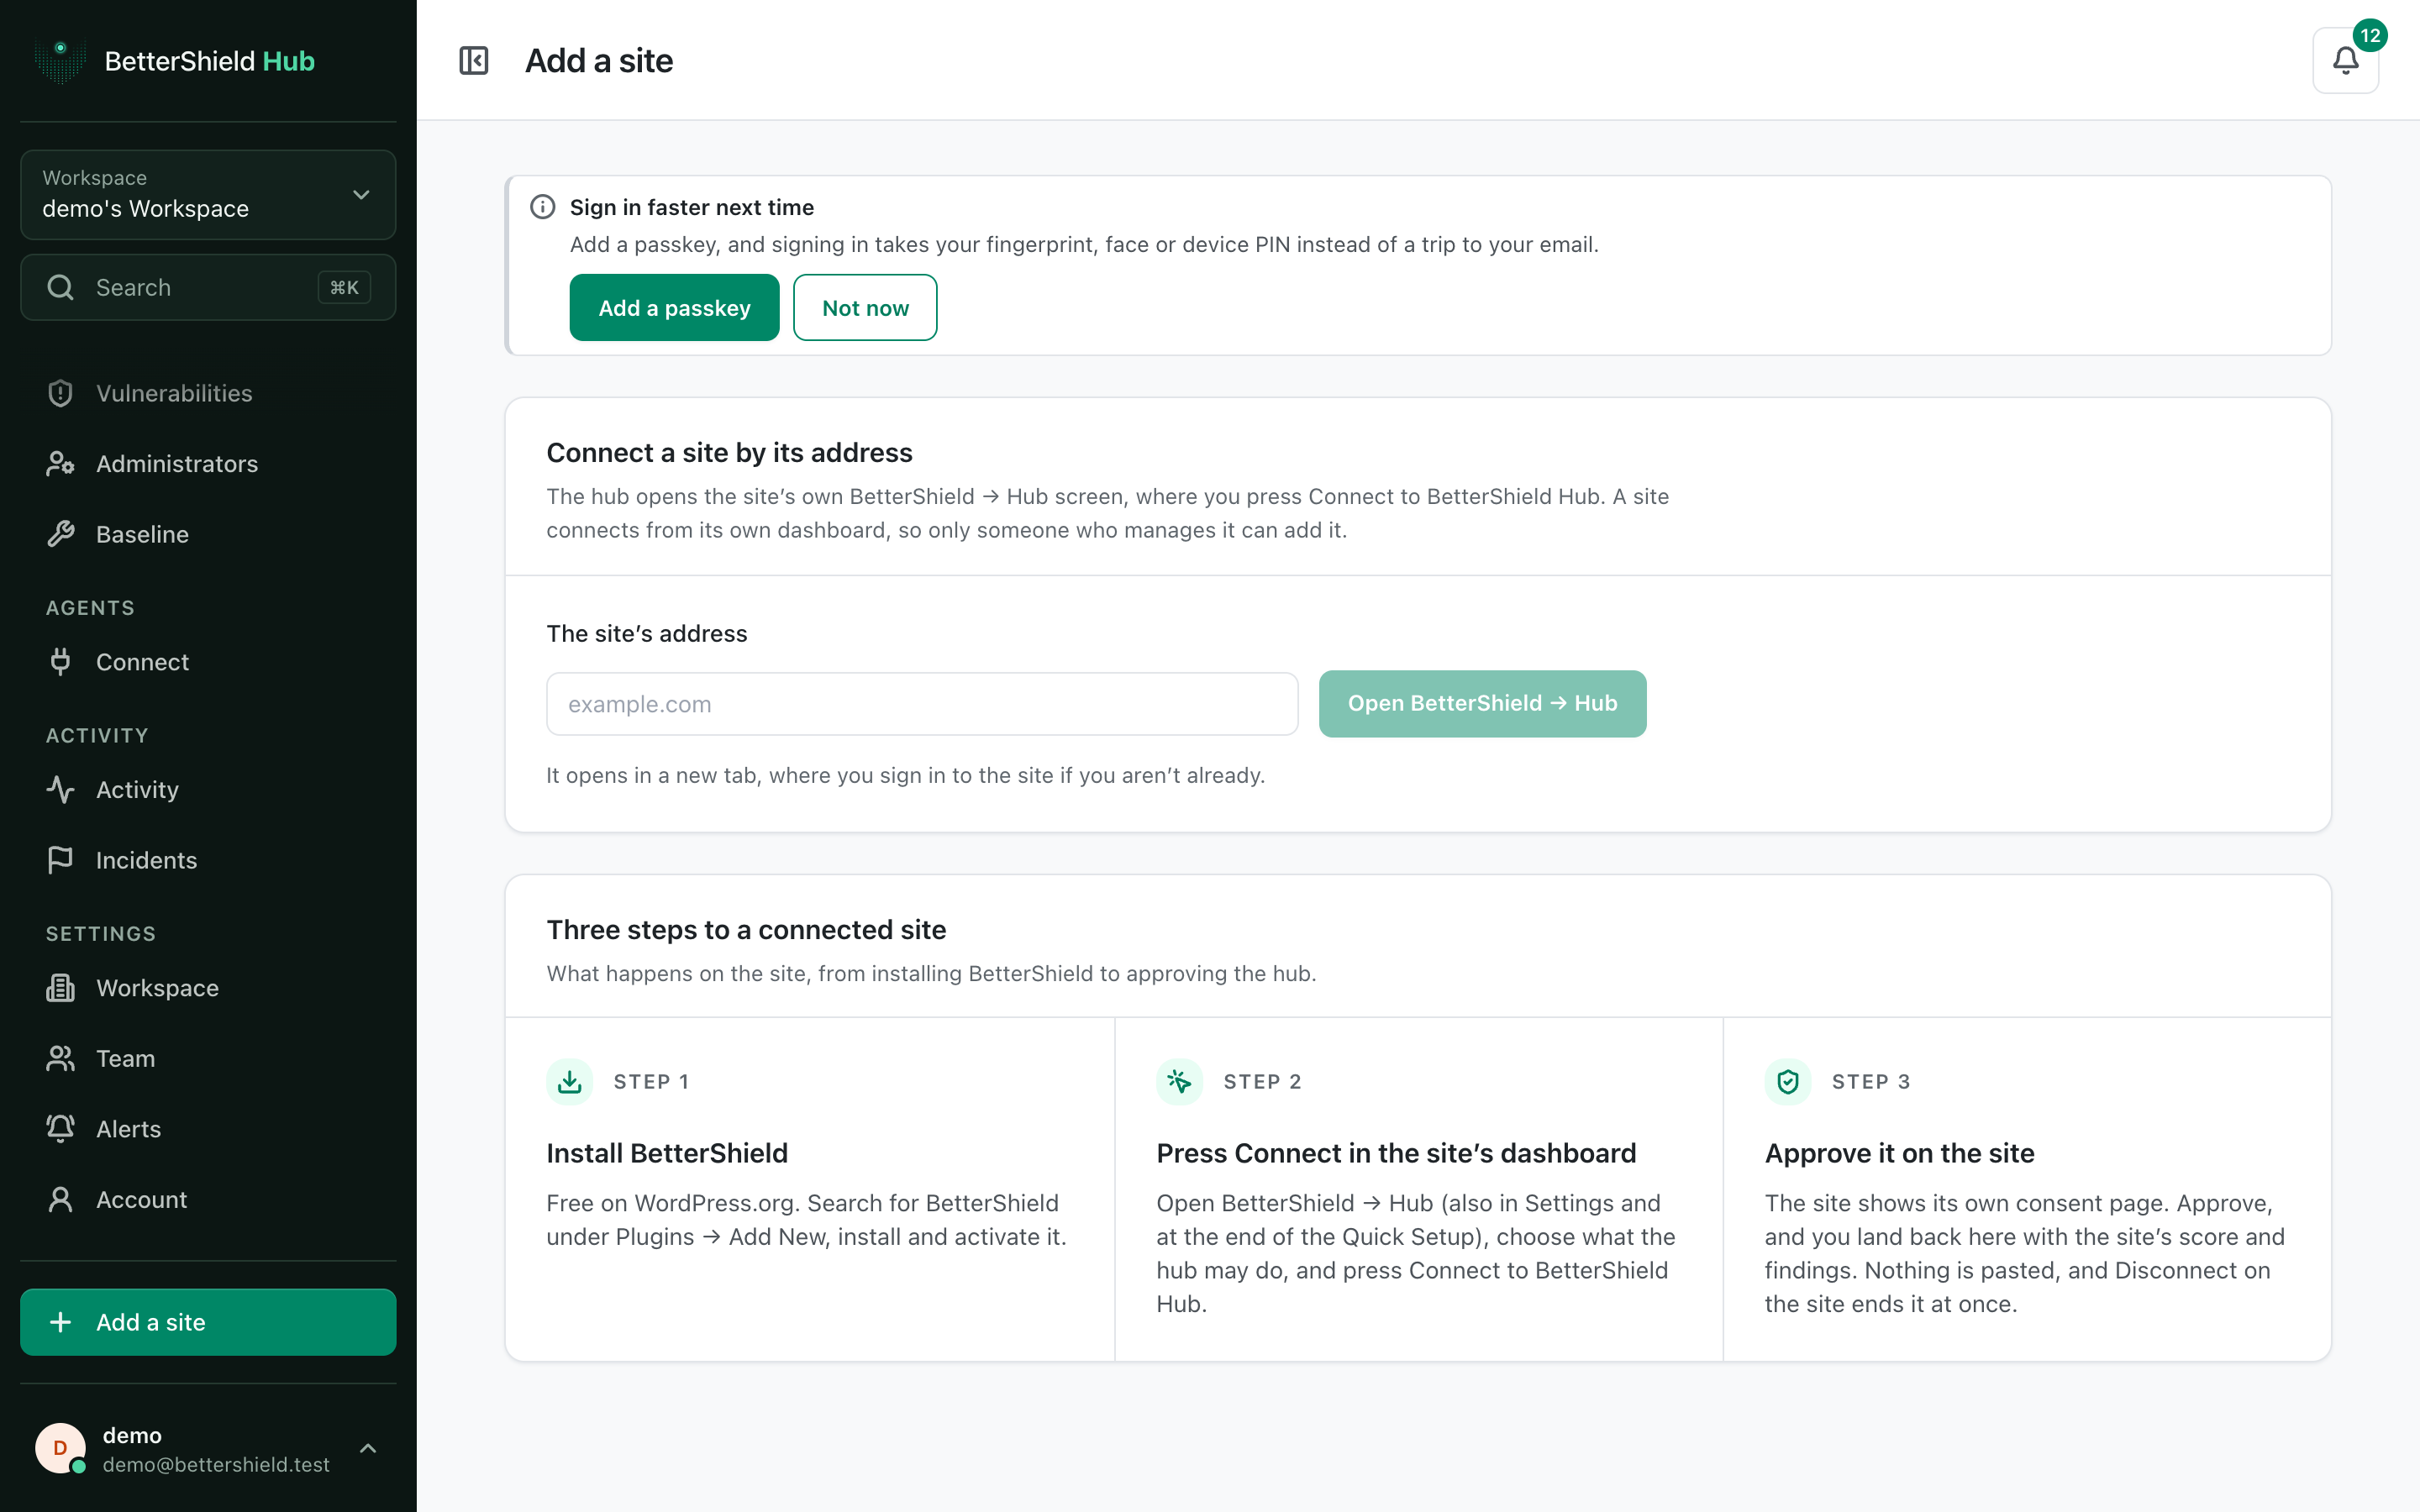
Step 2: Add a site to BetterShield Hub
- Enter The site’s address, such as
example.com. The field starts empty. - Select Open BetterShield › Hub.
- Sign in to WordPress if needed.
- Choose what Hub may do and select Connect to BetterShield Hub.
- Approve the site’s own consent page.
The completed connection returns you to Hub with the site’s score and findings.
Recommended settings
Our advice:
- Use the live site’s canonical address.
- Start read-only if the workspace only needs reporting.
- Confirm the site name and address after it appears in Hub.
What it can break and how to undo
Opening the address changes nothing. A connected Hub with change access can later apply supported plans after confirmation.
Use Disconnect on BetterShield › Hub in WordPress to end the connection. Removing the site from Hub alone may leave the site-side connection until it can confirm.
Final Outcome
The site appears under Sites.
- Its page shows a score, findings and a recent Last read.
- The WordPress Hub screen shows it as connected.
Related
This is how you can add a site to BetterShield Hub.
Getting Stuck? Feel free to contact our Dedicated Support Team.