How To Manage the BetterShield Hub Workspace?
Rename a Hub workspace and find its tags, alert destinations, brand, status pages and client reports.
Settings › Workspace holds settings shared by the current BetterShield Hub workspace.
Note: Sign in to your free BetterShield Hub account. Your workspace role and site permissions determine which information and actions you can use.
What it does
The screen holds the workspace Name, tags, Alert destinations, Brand, Status pages and Client reports. Owners can also delete the workspace.
Permissions differ by card. A member can see the workspace, while owner or administrator access is required for shared changes.
Step 1: Open Settings › Workspace
Open Settings › Workspace.
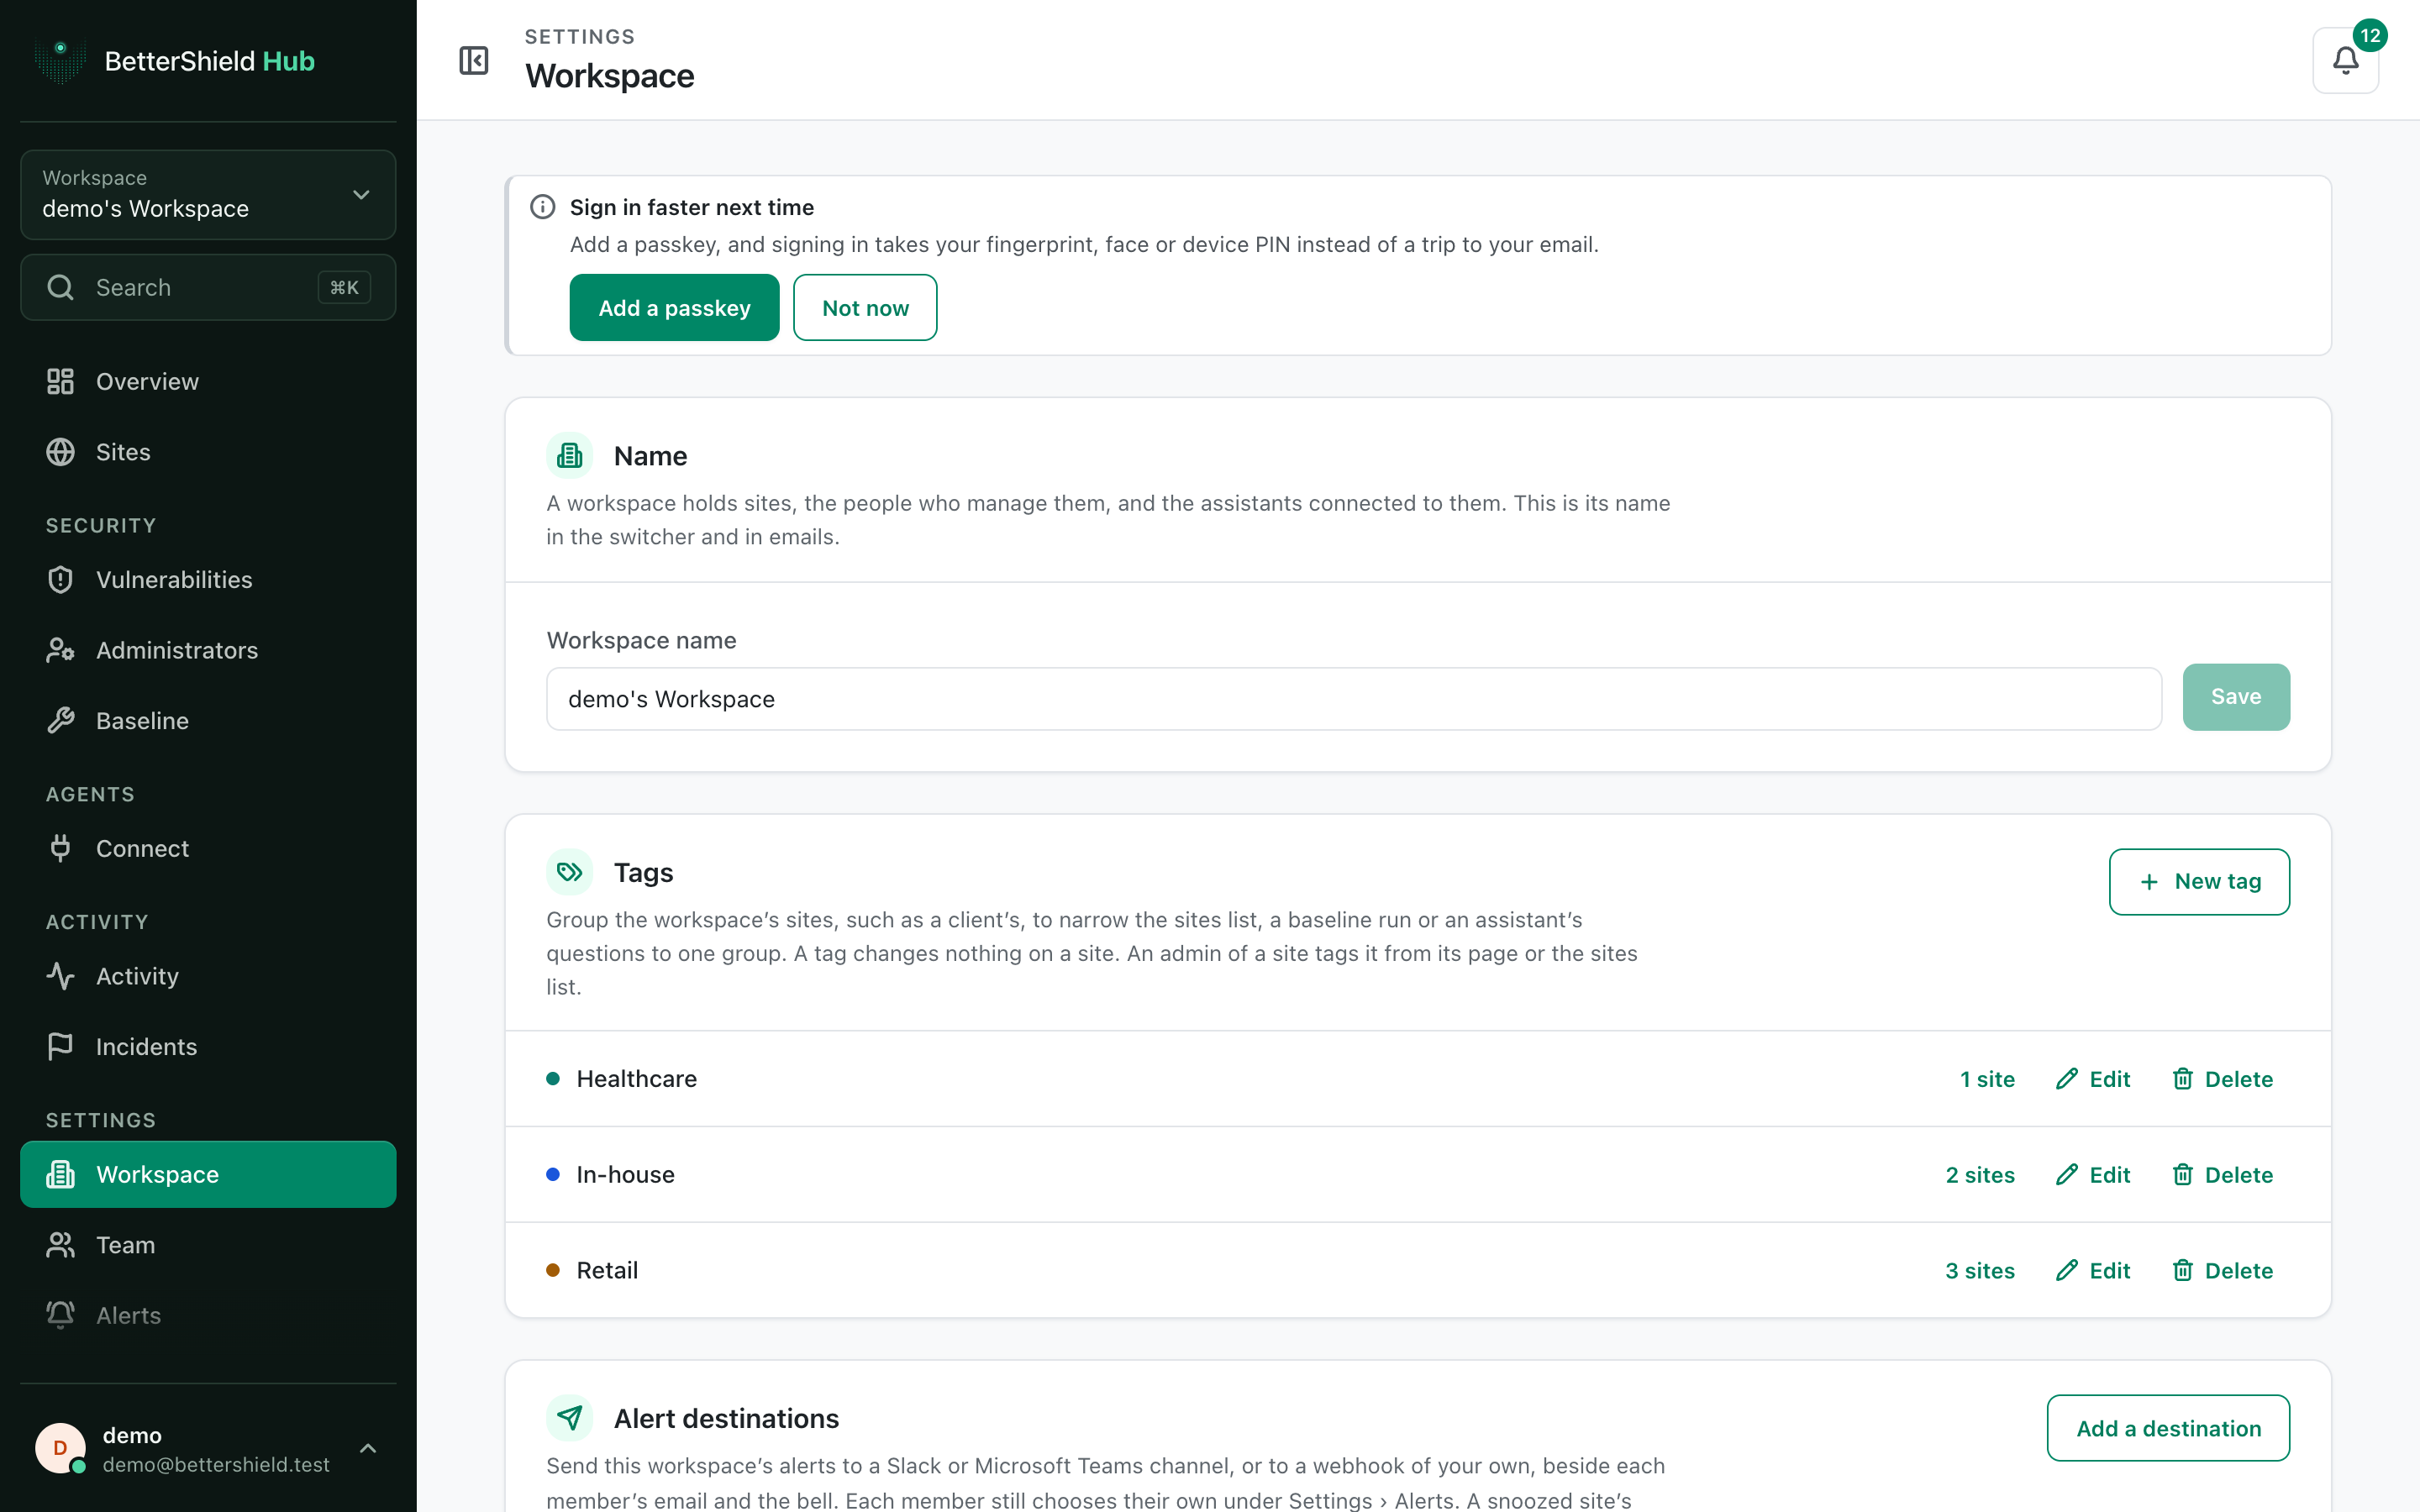
Step 2: Manage the BetterShield Hub workspace
- Under Name, edit the name and select Save. The existing name is the default.
- Create or edit tags for groups of sites. No tag is created automatically.
- Continue to the focused card for destinations, brand, status pages or reports.
Recommended settings
Our advice:
- Use a name that distinguishes the agency, client or operating team.
- Keep tags few and consistent.
- Give shared alert and report settings a named owner.
What it can break and how to undo
Renaming changes the workspace switcher and Hub email wording. Rename it again to restore the old name.
Delete this workspace removes the workspace and its Hub records. Treat it as permanent and read its confirmation carefully.
Final Outcome
The saved name appears in the workspace switcher.
- Tags appear on site dialogs and filters.
- Shared cards show the current workspace’s records after reload.
Related
- Brand shared Hub pages
- Send Hub alerts to workspace destinations
- Publish a Hub status page
- Send Hub client reports
This is how you can manage the BetterShield Hub workspace.
Getting Stuck? Feel free to contact our Dedicated Support Team.